
I never cease to be amazed at the ideas, arts, crafts and recipes that I find on Pinterest. I am even more impressed with the fact that I have been doing Pinterest Project Thursday for a while now and I have not missed a week since I started!
Every Thursday {hopefully I can keep this up} I will tackle a Pinterest Project and share with you both the original “Pin” as well as my version of the project. This can be arts, crafts, recipes, or projects… pretty much anything. I encourage you to join in! One Pinterest Project at a time!
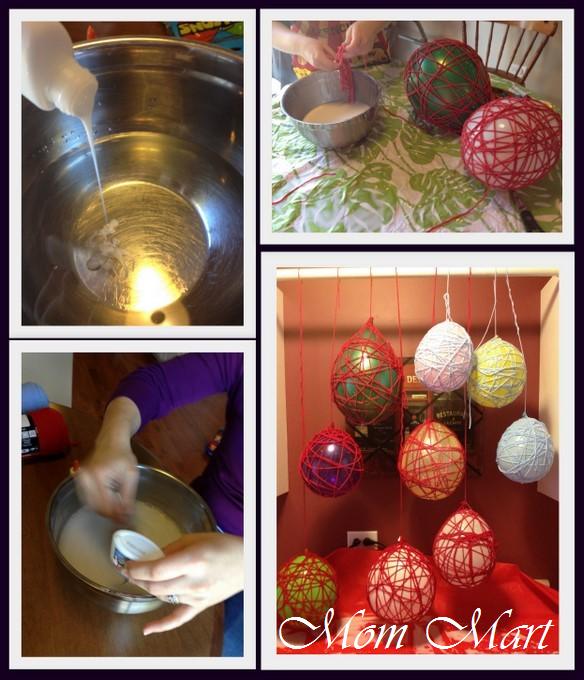
This week I am sharing with you my Yarn Balloons!
My Yarn Balls:

My sister-in-law and I decided that this was going to be our next Pinterest Project that we would tackle. I wanted to create the yarn balloons for decoration for my son’s third birthday party coming up and Wendy wanted to create the yarn balloons for a Valentine’s Day decoration. I think that these yarn balloons would make great decorations for any number of parties or holidays.
What you need for this project:
· Yarn (I bought the Red Heart Worsted yarn because it is one of the least expensive yarns out there)
· Balloons (We used a variety pack)
· Bowl
· Glue (we used three 8oz bottles of glue for nine total yarn balloons)
· Water
· Tablecloth or Old Newspaper
· A Place to hang the balloons to dry.
How to do it:
1. Lay a table cloth or old newspaper over your work area {this is a messy craft}.
2. Pour 5 cups of water into a bowl and mix in the 3 containers of glue.
3. Blow up the balloons that you will use for this craft {all of them- this is NOT a complete one and start at the beginning for the next one type of craft}.
4. Pull the center string of the yarn that you will be using loose so that you can dip it into the bowl of glue mixture.
5. Tie the yarn to the balloon.
6. Dip the yarn into the glue mixture and them wind it around the balloon {keep switching how you are holding the balloon so that the string moves in all directions}.Continue this step until you have the desired look.
7. Tie off the string to the balloon and leave a tail {you will need this to hang the balloon}.
8. Hang the balloon to dry {it is a good idea to place a tablecloth or some old newspaper beneath the balloons as they dry. The glue mixture drips}.

Rating: ***
I hated this project when we started it. There were no directions for how to do it on the originally pinned website. We had to guess the ratio of water to glue and hope that we were right. We were not forewarned about the messiness, it was really messy! There were no instructions for how to make it at all!
While spending more time working on this project we started to get the hang of how to wind the yarn around, but it was more of a trial and error type of thing.
If you are going to attempt to make this project here are my helpful tips: use small balloons, wear an apron, have plastic tablecloths, and make sure the string at the end is long enough to vary the height of balloons as they dry.
What do you think?

What do you think?
The original Pin:
